Pages

Welcome to Jack's Painting!

Specializing Warhammer 40k, Warhammer Fantasy, and Historics.


Wednesday, May 11, 2011

40 Ork Challange- Day Two

Sorry this post is coming a day late, I got caught up painting Dark Eldar.

While the challenge is to paint 40 Orks by this Friday the 13th.  Ominous no?

*Note* it is important to give credit where credit is due. All of the nice quality pictures on this blog were taken by Owen.  I am all fingers and thumbs when it comes to cameras. If you have any questions about photography, be sure to shoot us an email and I will pass it along to Owen.


I would have to say that Owen has been the brains behind this operation. From working out the scheme to assisting with the actual painting.  There has been nothing but support.  I wish everyone out there could have as awesome of a partner is crime painting. 


In light of the DE commission, Owen was nice enough to help me whip up some test models. 


Compare our two figures
Owen
Dave


As you can see from this guy, my highlighting got a little out of control. Be sure that if you mix white in as your highlight color, that you do not go over 1:1. Owen, on the left used an appropriate amount of white to highlight the figure.  The result is top notch skin in comparison to my Better Homes & Gardens Ork.

While none of these are finished or based, they do show the general idea of the paint scheme.


What is better than Boyz?  MORE BOYZ!!!!!


I would have to strongly recommend Sandwyrm's Color Theory article over on The Back 40k.  This is an awesome collection of articles that really explain how colors work together on the model.  I would highly recommend giving it a read.


C&C appriciated,

Thanks for looking,

Dave

Happy Trails

Tuesday, May 10, 2011

Dark Eldar Commission: Finished

Tonight I was able to finish the Dark Eldar Warrior Squad commission.  This took me around 4 days, in addition to other projects I was working on.

I am very happy with how the flesh worked out, as well as the hair, highlights, and basing.

Group Shot

Group Shot

1/2 Squad

Other half

Up close and personal
Here are some of the individual figures that I thought came out fairly well. I went with an accent color of Solar Orange then a wash of Devlin Mud then a highlight of Orange again, followed by a further highlight of Skull White and Solar Orange.
I thought his face came out well
Dark Eldar Warrior
 When highlighting the edges of the armor, it is key to maintain a slightly thick paint consistency.  When your paint gets too wet, it will flood the crevices.

Dark Eldar Warrior

Dark Eldar Warrior
It is very important to paint all parts of the model.  Neglecting small things like hair bands is very tempting, but it will detract from the figure.  When you are putting 15+ hours into a squad, what is 5 more minutes?
Dark Eldar Warrior

Dark Eldar Warrior
 I have found that a wash of Badab Black over Boltgun Metal works wonders.  A further highlight of Boltgun Metal, followed by Chainmail can really make your metal parts pop.
Dark Eldar Warrior

Dark Eldar Warrior
 Games Workshop has done an AWESOME job with the plastic kits. They mesh together wonderfully and really provide a menacing look for the Dark Eldar.
Dark Eldar Warrior
These guys were painted with the Kabal of the Poisoned Tongue.

The bases were drybrushed with Codex Grey, Fortress Grey, and Space Wolf Grey. Bright green static grass was added. The rims will be painted black, but I wanted to get these up for you guys!

Thanks for looking,

Dave

Monday, May 9, 2011

Dark Eldar Commission

Here are some Dark Eldar work in progress figures.  They are nearly done, just require flesh and basing.

The client wanted the Games Workshop paint scheme Kabal of the Poisoned Tongue

I attempted to follow it to the letter and I think they came out very nicely.  I plan on painting the hair orange and the flesh a pale Deneb Stone.

Single figures


Group shot of 3

Group shot of 5


Full 10 man squad
C&C Appreciated

Thanks for looking,

Dave

40 Ork Challange- Day One


40 Ork Challenge- Day 1
Lucien Mazan- first 2 time Tour de France winner
Like any athlete training for a sports meet or a scholar crafting an argument, it is important for anyone attempting to make gains or development to push themselves past their comfort level.  In my opinion, a hobby is no different. 

To get better, it is necessary to push oneself.  I am a relatively slow painter so I wanted to take on a challenge that would push me to paint faster, while maintaining quality.  This is that challenge.


The Challenge:  This one week challenge is to paint 40 Assault on Black Reach Orks in one week.  The deadline is midnight on Friday the 13th.

Today I primed all of the Orks using Valspar Primer.  Note* not all 40 Orks are in the picture, some have been used for test schemes. 
The Boyz in all their glory
Tomorrow I plan on washing all of them with Codex Grey and completing all base colors. Check back every day to see how this progresses!!!

Thanks for looking,
Dave

HISTORICON 2011

HOT OFF THE PRESS!!!!

Jack's Painting will be attending HISTORICON 2011.


The theme of this years convention is


“Brother Against Brother” 
The war that changed America – the American Civil War, 1861-65

Where: Valley Forge Convention Plaza, Valley Forge PA, USA
Dates: July 7-10

Be sure to check out their website 

This is sure to be a great time, hope to see you there!!!!

Dave

Tutorial Tuesday: Basing

In these posts I would like to take time to explore hobby tips and tricks that can make life easier.

Often times handling figures will transfer oil from your hands onto the model.  This will form a coating on which ever parts are touched, leaving an oily residue that has a negative impact on the ability of paint to adhere to the figure.  This results in faster wear and tear as well as chipping.

In order to combat this there are several ways to mount figures to "improvised" bases that give increased handling and keep figures clean. 

One of the ways I like to mount figures is on bottle tops.

 5 Figures mounted to assorted bottle tops
This is a great *low cost* way to mount figures and keep oily residue off of them.  Without these, attempting to paint 25/8 mm figs leaves you in this unfortunate situation.

A bad case of "No Base to Hold On To"
In the picture above, I have no way to grip the mini without obscuring areas I need to paint.

The solution?  Mount it to a bottle top holder.

The first and most important thing when mounting any type of miniature to a temporary base is to use the correct type of glue.  I like Tacky Glue.

A small bottle of Tacky Glue
 This small bottle of Tacky Glue will run about $1.00-$2.00 depending on where you buy it.
The best, and most important thing about Tacky Glue is that it is a WATER based glue.  This means that when you are done painting your figure all you have to do is run it under some water and the glue bonds will dissolve and figure removal is a breeze.

If you use any other type of glue, make sure it is water-based.  If not, it will be next to impossible to remove it from your temporary base.  This has the potential to ruin all your hard work.

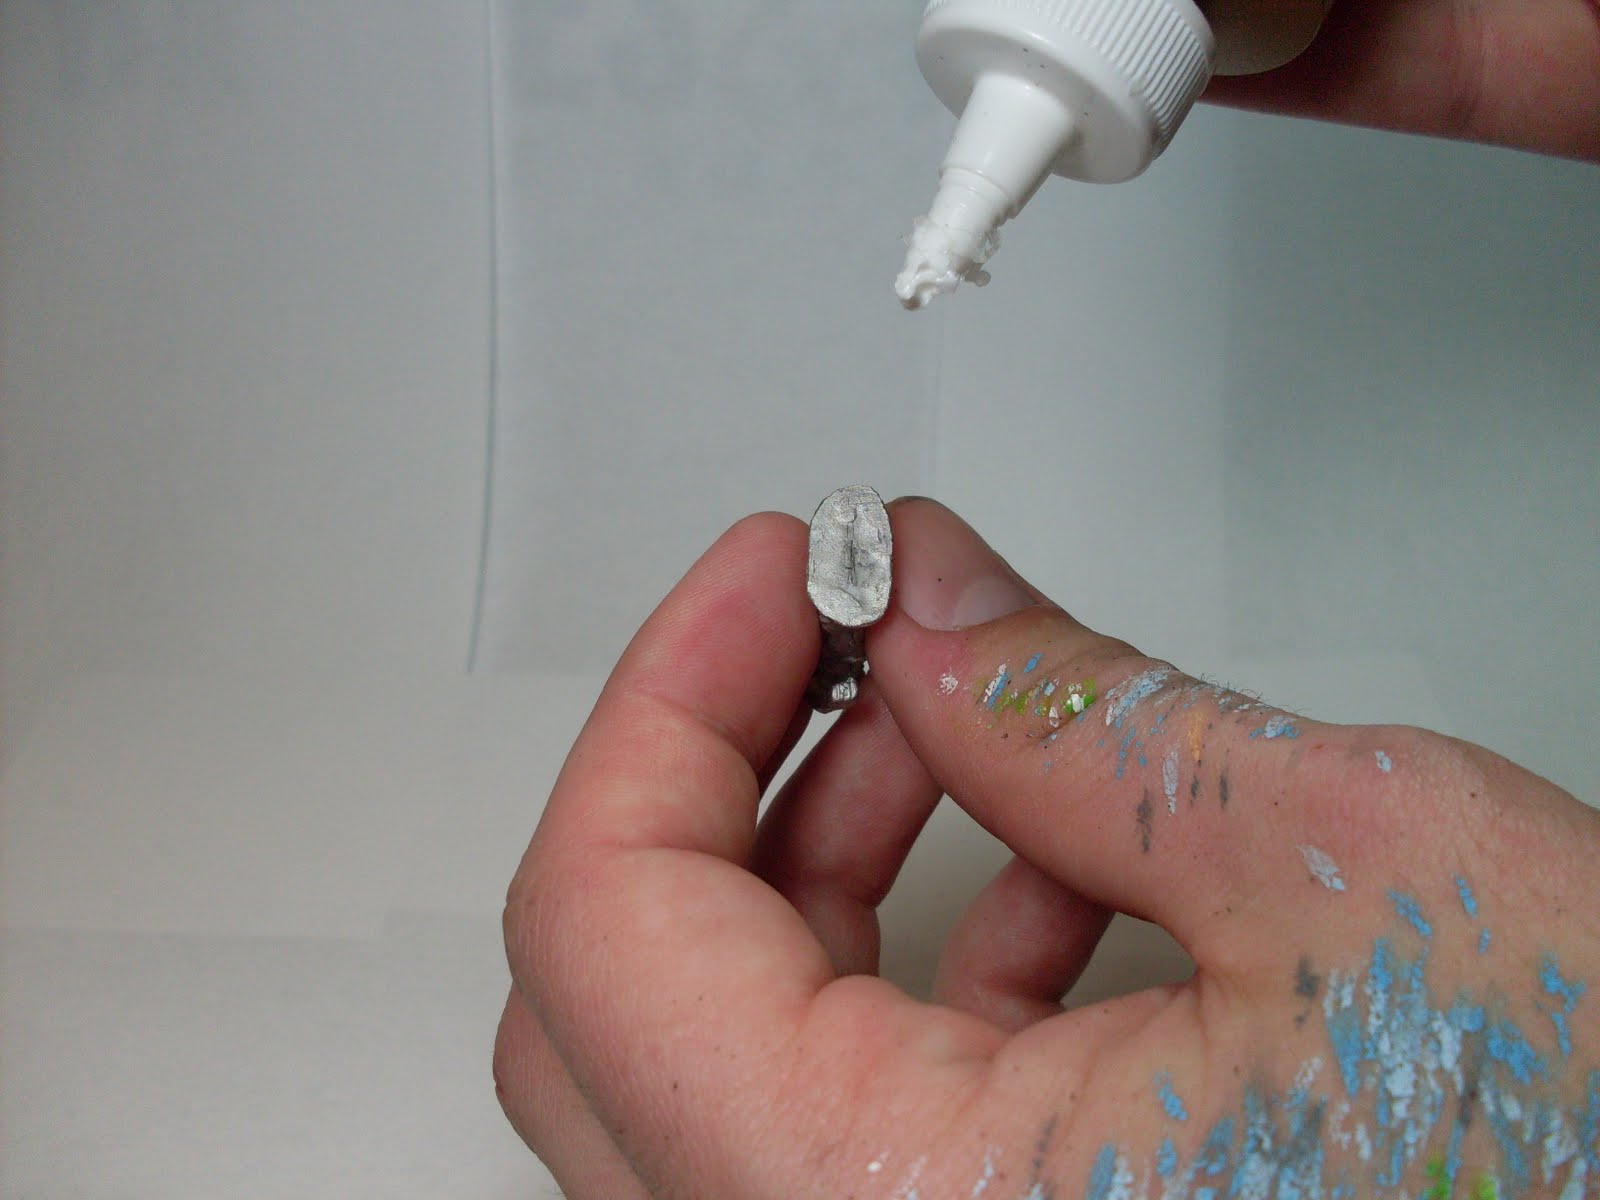
The next step is to place a small pea-sized drop of glue to the bottom of your figure.

Applying glue to the base
An appropriate amount of glue
Once the glue has been applied it is important to attach it to the temporary base.

Figure attached to the temporary base

Let your figure dry for 30-45 minutes and you are good to go.

The Tacky Glue bond is fairly strong and should not break when handled roughly.  Now, this is not an excuse to throw your figures at that younger sibling no matter how tempting.

Figures secured with Tacky Glue- upside down

There you have it.  These hand holds will allow you to hold your figure without damaging it or leaving an oily residue.  To remove your figure, simply run it under cold water and the glue will dissolve. Don't worry, if you are using Citadel paints, they will be fine.

Other items that may be used as temporary bases

Popsicle stick or tongue depressor.

Figure mounted to a tongue depressor
This gives you a priming stick as well as a way to hold your figure; that's a 2 for 1!  Does it get any better?

You can also go end to end to maximize use for 25mm figures.


Make sure that you have the figures facing opposite directions, this will help enormously unless you are ambidextrous with a paint brush.

Well that is all for now, thanks for tuning in,

Dave  

Sunday, May 8, 2011

Ultramarines

Here are some Ultramarines that were painted up recently.

The basecoat is Games Workshop Mordian Blue, followed by one to two thin coats of Ultramarine Blue.

The helmet was basecoated with Mechrite Red with Blood Red layered on top.  I find that Mechrite Red provides a great base over black.

Sergeant with Powerfist 

Same chap, 3-quarter view
Here you can see how I painted the eyes, Goblin Green with Scorpion Green towards the center and a dot of Skull White on the outermost edge.
Neat conversion I copied. 
You have to wonder why they are still giving them Plasma guns.....  gotta love that 3+
3 remaining guys of that squad

Side View


The basing on these guys was a general drybrush of Codex, followed by Fortress and Spacewolf grey, in successive lighter passes.

Hope you like them.

Thanks for looking,

Dave