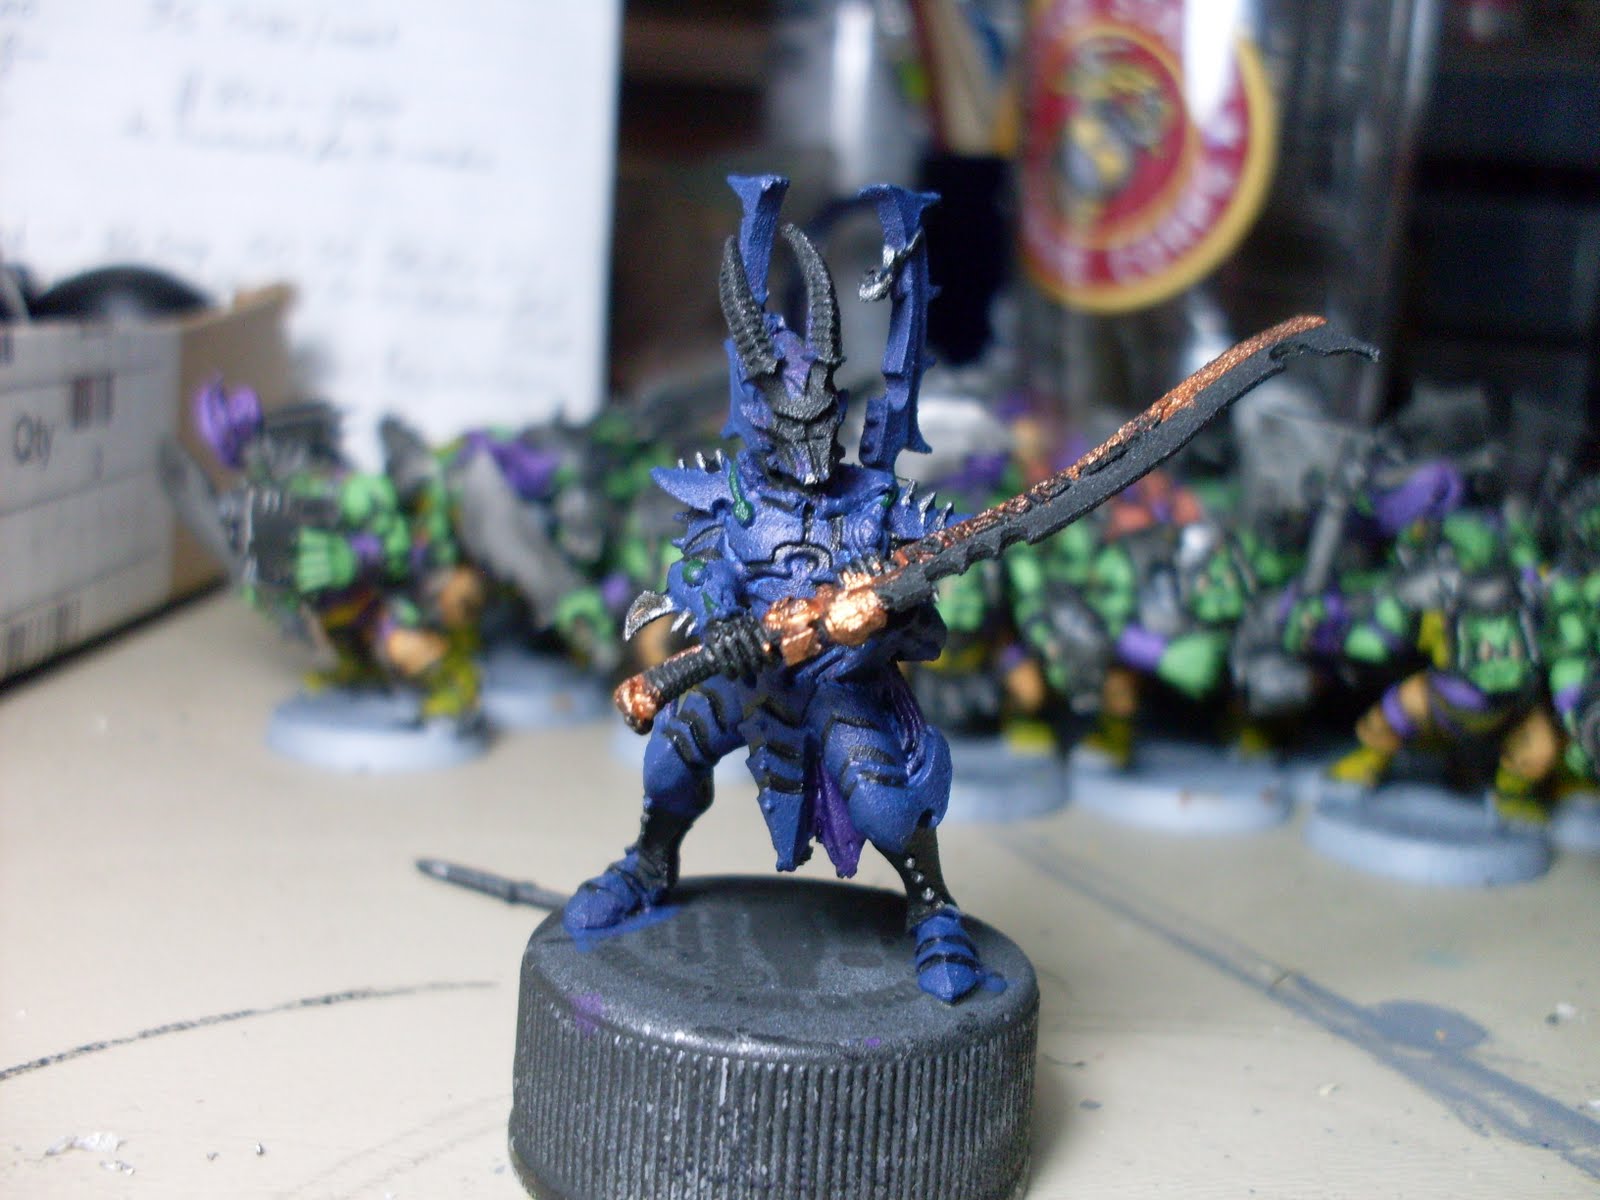
Much like the Incubi of a previous post, I was in such a rush with the Venom Challenge that I forgot to take pictures. However, I was able to grab a few shots this past Saturday at the Hobby Chest. So, without further adieu I present the final pics.
I do apologize for the bad pictures, I will be sure to get better ones in the future.
This past weekend I was at the Hobby Chest and I ran into a really nice gent who, after eight years in the United States Marine Core, (you know, that institution that defends our freedom) decided to resurrect a 1993 interest in Warhammer. As an Ultramarine buff myself we, along with other people in the store, were discussing the finer points of the painting, gaming, and politics.
Incidentally, this gent loves to play Warhammer 40,000 and loves great looking models. I like Warhammer 40,000 and love to paint. Thus a plan was hatched.... The chicks loved it.
Chicks loving our hatched plan
We worked out a system that would leave him a vibrant, great looking army, and allow me to paint some awesome models. I have to admit that some of these ideas put me way out of my comfort zone. Some of you may remember my Ultramarines, notice that they are very mellow and flat. I felt that this pushed me to work with colors that I had little experience with to create a model that is, in my opinion, totally unique.
Front
In this instance Owen was instrumental in working out colors. I like to paint, but I tend to work myself into a place where I do not push the color envelop and stick with what I am comfortable with.
Back
Io have to say that Calthan Brown is a wonderful color to use. Where most browns have either a yellow, like Snakebite Leather, or red, like Scorched Brown, tint. Calthan Brown is an awesome neutral color that goes well with just about everything. In this instance I have painted the rim of the base and the pouches.
Side
I painted the lenses and drilled out the Bolter barrel, sometimes a project just calls you to go that extra mile. I am happy to say that this is one of them.
I am very excited about this project and am looking forward to producing an army that will be vibrant, look good on the table, be fun to play, but above all, be something that one can be proud of.
I will be continuing to work on the Dark Eldar project as well, so expect updates!
Hey folks, I forgot to update the final pictures for the Incubi when I finished them. In an attempt to rectify this I present the final pics of the Incubi.
Thanks for looking, the final Venom pictures will be updated in the next day or so,
Phew, what a busy few days it has been, completing the Venom Challenge on Saturday, then starting and finishing the Parasite Engine over the last two days, I am about ready for something other than Dark Eldar. Alas, no rest for the weary.... But there is always a bright side, in this case new pictures!!
One of the first things I loved about this model were the chest and arms. I attempted to replicate the purplish hue that is found on the GW minis. Here are a few WIP shots.
Right Side
Head on
Left Side
Through out the whole process, this guy was an absolute terror to hold. I would STRONGLY suggest painting it in it's various components. It will help reduce breakage and smudging fingerprints.
The chest and skin was by far the most fun to paint. I started off with a solid basecoat of Deneb Stone, followed by a light wash of Leviathan Purple (the GW purple wash). After that I build up gradual layers of Deneb Stone and a mix of Deneb Stone and white.
The tentacles were a huge pain. On the front two I took my time and layered each coat of paint. This was very time consuming, and in my opinion, did not produce great results.
The line highlights were done in the same manner as all of the other ones in this army, one thick line of Adeptus Battlegrey, followed by a thinner line of Codex Grey.
It is almost a necessity to paint this kit with the various "torture racks" and "bits and bobs" attached to bits of sprue. I glued the side bits in to early and as a result broke most of them off several times.
This back spirt caster was painted with the same color scheme as with the other greens like on the Incubi blades. The metal was done with Tin Bitz, Dwarf Bronze and a wash of Devlin Mud.
I decided to do something a little different with the lower or leg tentacles. A simple drybrush of all of the skin colors worked out wonderfully, and I don't think the difference is noticeable.
As with all of the other colors in this Dark Eldar army, the green, silver and bronze bits were all done in the same fashion. I hope that this will promote some sense of unity within the force.
Al Capone- American Gangster
Cronos- Parasite Engine
"Here is looking at you fella'"
Striking Resemblance, no?
Thanks for tuning in for your daily dose of humor and American trivia.
I feel really lucky to be able to paint this bad boy before he comes out next month. I wanted to take a moment before I sat down at ye old hobby table.
Ye Olde Amish Workbench
Not quite the same thing but you get the idea.... Anyways, on to pics!!
Tentacle monster of doom
Cronos Parasite Engine
I will have this guy finished by tonight, so check back for updates!!!
A cookie for anyone who can spot what is in the background.
Every once in a while we get the opportuity to work on something top secret... something that is eyes only... something that is pre-order.
Yes, ladies and gentlemen this the one and only Dark Eldar Venom, on sprue, and at my work bench.
Dark Eldar Venom- click for larger image
I figured I would celebrate the occasion with a bit of a challenge.
The Chalange: Assemble and paint 1 Dark Eldar Venom in 24 hours.
I started off by assembling the vehicle. Thankfully, things went off without a hitch. I was not so lucky with priming. I would have to give a word of advice to all other hobbyists out there; Make sure your humidity is LOW. I had typically waited for a less humid day to prime, but as this was a challenge, why not challenge everything?
Hull
Owen was nice enough to help me strip and re- prime the crew.
I then preceded to pull the "all nighter." As a veteran of the procrastination school of thought I have spent an excessive number nights staying up to get my schoolwork done. Take it from someone who has been there, don't pull all nighters. It will wreck your body and will test the limits of patience of those around you, in this case, Owen.
While the methods are not so great, the results speak for themselves.
I painted from around 9 pm to 4 am to get the hull (and a few other things) done. I suppose I am now a member of the not so exclusive all-knight organization.
Regrettably I have no further pictures as I was a bit caught up with the challenge. However, I will be adding some finished pictures Wednesday.
I spent most of today working on the Incubi. As they are an elite unit, I put much more effort into these five models. Honestly I wanted to see how well I could paint them. I employed several techniques that I have not yet used on this blog.
The Incubi are wonderful models. My only issue with them, other than the ones raised in the previous post, is the nature of the poses. It seems like they are both static and fluid at the same time. If you look at the cloth and the upper bodies of two of the poses, they look as though they are attacking. However, if you look at the legs, they are completely static.
Fluid but Static
For those looking for the paint scheme and the paint scheme alone. Here ya go! Paint Scheme
Here are several work-in-progress shots for those who like that type of thing.
Basecoat
The model was first given a wash of Chaos Black, and was then bascoated with Necron Abyss. As you can see in the picture, my basecoat brush is quite large. It is a Citadel "Large Brush." I find that by using a larger brush I am able to move quickly through what can be a very tedious stage of painting.
The following pictures are the progression and development of the model.
Stage 1
Stage 2
Stage 2.5
Stage 3
Stage 4 and shot of cloth
Stage 5 and almost done
Well there you have it. These models are fun to paint and almost done. I will base them up soon enough and get some quality pictures up.
We all have those projects that we pick up for the fun of doing them or for the challenge. This was supposed to be the former, and it turned into the latter.
I have been very complimentary of the Dark Eldar line up to this point; Jes Goodwin has done a fantastic job with the overall sculpting and the plastic kits have been wonderfully interchangeable. However, this does not extend to the metal Incubi kit.
So, without further tarry, hold on to your hats, grab your helping hands and rubber bands, the Dark Eldar Incubi are a challenge in and of themselves.
The Bastille- in not so great shape
I have been modeling for several years now and the once scary multi- part metal models do nothing more than garner a passing glance. However the Dark Eldar Incubi are sure to strike fear into the heart of the most experienced modeler. Oxford dictionary defines Incubi as “a cause of distress or anxiety.” This could not be truer.
First off, the Incubi have these really sweet trophy racks meant to strike fear into Imperial Guardsmen and enthusiastic hobbyists alike. They are very small, temperamental, and are aligned at an awkward angle.
As you can see, it is off by about 45°. Clearly, the designer of this kit did not have to put it together. Normally I would simply pin this type of join, however, due to the fact that it makes contact at an angle, a pin would be more difficult.
I knew none of this.
Internal knowledge of Dark Eldar Incubi
So there we go, putting the Incubi together. I start off with the swords. This chap is an absolute breeze, I wish the others followed suit.
Mr. Easy Arms
After I get the swords on for those first two I spent over two hours “working” on getting them together. Keyword: Working. Now this is the type of work that your dad does on Saturday morning in the garage. But he, and I, were only getting very frustrated while getting nothing done.
I attempted to run and gun while assembling these and in the process I did a superb job of gumming up delicate joins with tones of 5 minute epoxy. These joins then had to be cleaned out so I grabbed my handy dandy…
Hobby Knife
The hobby knife was defeated.
So I turned to my handy dandy…
Pin Vice
The pin vice was also defeated.
Let me remind the hobby community that it is usually necessary to have the best tool for the job. Sometimes it is necessary to use the tool that will get the job done. So with much swearing and grumbling I decided that all bets were off.
I turned to my handy dandy…
Cordless Drill
The drill was able to clean out enough epoxy to finish the build.
The product of hours of swearing and grumbling
All in all this was a very frustrating several hours. If you have the option to have someone competent assemble this kit, take it. You know those guys at your FLGS that are always asking to borrow paint or glue? Now is the opportunity to CASH IN THOSE FAVORS!!! Save yourself the time, and as Oxford tells us, distress and anxiety.
Lessons learned
·Get familiar with your models beforebreaking out the glue.
·Have a plan for assembly.
·Have plenty of assistants. (rubber bands, helping hands, girlfriend, etc)
·If using any type of epoxy, make sure your assemble in stages.